
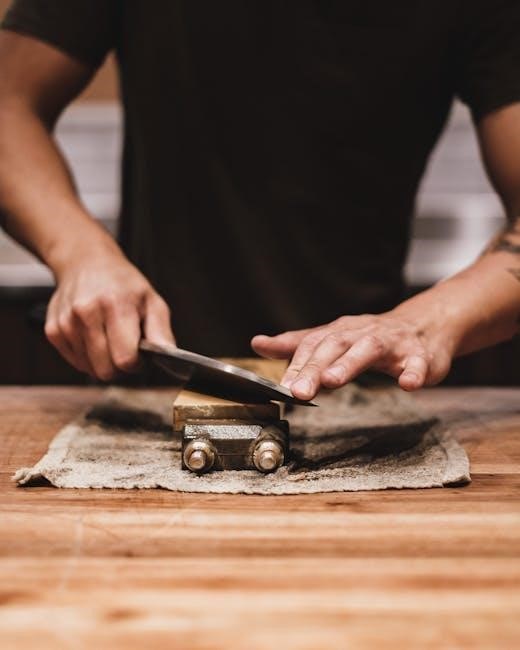
Maintaining a keen edge on your knives is crucial for safety and efficiency in the kitchen or workshop․ Angle guides simplify achieving consistent sharpening,
especially for beginners, by ensuring the correct blade angle is maintained throughout the process․ Consistent angles are key to restoring a knife’s cutting ability․
What is Knife Sharpening and Why is it Important?
Knife sharpening is the process of removing tiny amounts of metal from the blade’s edge to recreate a sharp, functional angle․ A dull knife requires more force to cut, increasing the risk of slipping and causing injury․ Regular sharpening not only enhances safety but also improves cutting performance, making food preparation easier and more enjoyable․
Maintaining the correct angle is paramount; inconsistent angles lead to uneven sharpening and a less effective edge․ Sharpening restores the knife’s ability to cleanly sever materials, reducing crushing and preserving texture․ Ultimately, a sharp knife is a safer, more efficient, and more pleasurable tool to use in any setting․
The Role of Angle Guides in Knife Sharpening
Angle guides are invaluable tools for both novice and experienced sharpeners, ensuring consistent blade angles during the sharpening process․ They simplify maintaining the correct angle, eliminating guesswork and promoting even sharpening along the entire blade length․ This consistency is crucial for achieving a sharp, durable edge․
Guides come in various forms, from bench stone attachments to magnetic and clip-on devices, catering to different sharpening methods and preferences․ Using an angle guide minimizes the learning curve and reduces the risk of damaging the blade through incorrect technique, ultimately leading to better results․

Understanding Knife Angles
Knife angles dictate sharpness and durability; steeper angles offer robustness, while shallower angles provide a keener edge․ Maintaining consistency during sharpening is paramount for optimal performance and longevity․
Common Knife Angles and Their Uses
Western knives, often used for heavier tasks like chopping, typically feature an angle of 20-22 degrees․ This provides a robust edge capable of handling tougher materials, though it may not achieve the ultimate sharpness․ Japanese knives, renowned for their precision, generally employ a narrower angle of 15-18 degrees․
This sharper angle excels at slicing and delicate work, but requires more careful handling to avoid chipping․ Utility knives often fall in the 20-degree range, offering a balance between sharpness and durability․ Specialty knives, like fillet knives, may have even shallower angles for effortless slicing through fish․ Angle guides help replicate these angles consistently․
Impact of Angle on Knife Performance
A smaller angle creates a thinner, sharper edge, ideal for slicing through delicate items with minimal resistance․ However, this edge is more prone to rolling or chipping under stress․ Conversely, a larger angle produces a more durable, robust edge, better suited for tasks involving force, like chopping․
The angle directly influences how easily the knife penetrates the material and how well it holds its edge․ Using an angle guide ensures consistency, maximizing performance․ Incorrect angles lead to dullness, inefficiency, and potentially dangerous situations․ Maintaining the correct angle is paramount for optimal cutting ability․
Measuring Knife Angles – Tools and Techniques
Accurately determining a knife’s existing angle is vital before sharpening․ Angle guides often have pre-set angles, but verifying the original is beneficial․ Simple tools include angle finders or protractors, placed against the bevel․ Visual estimation can work, but is less precise․
More advanced techniques involve using a sharpie marker – color the bevel, then sharpen lightly; the amount removed reveals the angle․ Consistent measurement ensures you replicate the original geometry․ Understanding this angle allows for informed sharpening, maximizing the knife’s performance and longevity․
Types of Angle Guides
Various angle guides exist, from bench stone systems with integrated guides to magnetic and clip-on options․ DIY solutions are also possible, offering versatility and control during sharpening․
Guided Systems – Bench Stones with Guides
Guided systems utilizing bench stones represent a robust and precise approach to knife sharpening․ These systems typically incorporate adjustable guides that clamp onto the blade, dictating a consistent angle throughout the sharpening process․
The bench stone itself provides the abrasive surface, available in various grits for different stages of sharpening – from coarse for repairing damage to fine for polishing․ These systems are favored for their stability and ability to maintain a fixed angle, minimizing user error․ They are ideal for those seeking repeatable results and a professional-level edge․ However, they can be more expensive and require a dedicated sharpening setup․
Magnetic Angle Guides
Magnetic angle guides offer a portable and versatile solution for maintaining consistent sharpening angles․ These guides typically attach to the blade using strong magnets, providing a secure connection during the sharpening stroke․ They are compatible with various sharpening stones and steels, offering flexibility in abrasive choices․
The adjustable design allows users to select the desired angle, catering to different knife types and sharpening preferences․ Magnetic guides are relatively inexpensive and easy to use, making them popular among both beginners and experienced sharpeners․ However, maintaining consistent pressure is crucial, as the magnetic hold might not be as rigid as clamped systems․
Clip-On Angle Guides
Clip-on angle guides are another popular and affordable option for achieving consistent sharpening․ These guides typically feature a clip that securely attaches to the knife’s spine, establishing a fixed angle relative to the sharpening stone․ They are generally made of plastic or metal and are adjustable to accommodate different blade geometries․
Clip-on guides are easy to set up and use, making them suitable for beginners․ However, the clip’s pressure can sometimes interfere with the sharpening stroke, and ensuring a tight, secure fit is essential for accuracy․ Proper adjustment is key to maintaining the desired angle throughout the process, preventing uneven sharpening․
DIY Angle Guides – Creating Your Own
For the resourceful knife enthusiast, creating a DIY angle guide is a viable option․ Simple methods involve using felt pads, pieces of wood, or even masking tape adhered to the blade to establish a consistent angle․ These homemade guides can be surprisingly effective, offering a cost-effective alternative to commercially available systems․
The key to success lies in precise angle measurement and secure attachment․ Experimentation with different materials and designs is encouraged to find what works best․ While not as refined as manufactured guides, DIY options provide a hands-on learning experience and a customized sharpening solution․
Sharpening Stones and Abrasives
Sharpening stones, available in natural, synthetic, and diamond varieties, are essential for refining a blade’s edge․ Choosing the correct grit is vital for effective sharpening and maintaining optimal performance․
Natural Sharpening Stones
Natural sharpening stones, formed over millennia through geological processes, offer a unique sharpening experience․ These stones, such as Arkansas stones, Belgian Coticule, and Japanese natural water stones, possess varying grit levels and mineral compositions․ They require soaking in water or oil before use, depending on the stone type, to create a slurry that aids in the sharpening process․
Natural stones are prized for their ability to produce a very fine, polished edge, but they often require more skill and patience to use effectively․ Their irregular shapes can also make maintaining a consistent angle challenging, even with an angle guide, though experienced sharpeners appreciate their nuanced feel․ They are generally slower at material removal compared to synthetic or diamond stones․
Synthetic Sharpening Stones
Synthetic sharpening stones are manufactured using various abrasive materials bonded together, offering consistency and a wide range of grits․ Aluminum oxide and silicon carbide are common abrasives, each providing different sharpening characteristics․ These stones are often more affordable and readily available than natural stones, making them a popular choice for both beginners and experienced sharpeners․
Synthetic stones typically require soaking in water before use, though some are designed for dry sharpening․ They offer a predictable sharpening rate and are easier to flatten, maintaining a consistent surface for optimal angle guide use․ Their consistent structure makes achieving a sharp edge with an angle guide more straightforward than with natural stones․
Diamond Sharpening Stones
Diamond sharpening stones utilize industrial diamonds bonded to a metal or resin surface, providing exceptionally fast and aggressive cutting action․ These stones are ideal for quickly restoring very dull or damaged blades, and are particularly effective when used with an angle guide for precision․ Diamond abrasives come in various grits, from coarse for reshaping to fine for polishing․
Unlike water stones, diamond stones often require only a light application of oil or water for lubrication․ They maintain their flatness for a longer period, reducing the need for frequent flattening․ Using a diamond stone with an angle guide ensures consistent contact and efficient material removal, leading to a razor-sharp edge․
Choosing the Right Grit for Sharpening
Selecting the appropriate grit is fundamental to successful knife sharpening, especially when utilizing an angle guide․ Coarse grits (around 200-400) rapidly remove metal, ideal for repairing damaged blades or establishing a new bevel․ Medium grits (600-1000) refine the edge, removing scratches from coarser grits and forming the primary bevel․
Fine grits (1500-3000+) polish the edge, creating sharpness․ An angle guide ensures consistent grit application․ Start with a coarser grit if needed, progressing to finer grits for a refined, razor-sharp finish․ Consider the steel type; harder steels benefit from finer grits․

The Sharpening Process with an Angle Guide
Proper setup and technique are vital․ Secure the guide, apply even pressure, and maintain a consistent angle during each stroke for optimal results․
Setting Up Your Sharpening Station
A stable and well-lit workspace is paramount for safe and effective knife sharpening․ Begin by selecting a non-slip surface, such as a rubber mat, to prevent your sharpening stone or guide from shifting during use․ Ensure adequate lighting to clearly see the blade’s edge and the angle guide․
Gather all necessary tools – your chosen angle guide, sharpening stone (or abrasive), a honing steel for finishing, and a clean cloth for wiping away metal filings․ Position the stone securely, and have a container of sharpening lubricant (water or oil, depending on the stone) readily available․ Organize your station to minimize distractions and maximize efficiency, prioritizing safety above all else․
Securing the Angle Guide to the Blade
Proper attachment of the angle guide is vital for consistent sharpening․ For clip-on guides, carefully align the guide with the knife’s spine, ensuring a snug and secure fit․ Magnetic guides should be firmly attached to the blade, verifying they won’t slip during the sharpening stroke․
Guided systems typically involve locking the blade into a specific position within the guide․ Double-check the alignment to confirm the desired sharpening angle is accurately set․ A loose guide will lead to inconsistent results, defeating the purpose of using one․ Test the stability before applying pressure during sharpening․
Applying Consistent Pressure During Sharpening
Maintaining even pressure is paramount when using an angle guide․ Too little pressure may not effectively remove metal, while excessive force can cause uneven sharpening or damage the blade․ A moderate, controlled pressure is ideal, letting the abrasive do the work․
Focus on applying pressure directly along the blade’s edge, following the angle guide’s direction․ Avoid rocking or twisting motions, as these disrupt the consistent angle․ Gradually increase pressure as you become more comfortable, always prioritizing control over speed; Consistent pressure yields a refined, sharp edge․
Maintaining a Consistent Angle Throughout the Stroke
The angle guide’s purpose is to ensure the blade remains at the correct angle during each stroke․ Focus on smooth, full strokes, utilizing the guide to maintain that angle from heel to tip․ Avoid lifting the blade mid-stroke, as this breaks contact and compromises consistency․
Visualize the angle and consciously maintain it throughout the entire movement․ Regularly check the guide’s alignment against the blade․ Consistent angle maintenance is vital for achieving a uniform, sharp edge along the entire length of the blade, maximizing its performance․

Advanced Techniques
Mastering sharpening with guides allows tackling diverse blade types and damage․ Burr formation and removal, alongside stropping, refine the edge for ultimate sharpness and longevity․
Sharpening Different Knife Types with Angle Guides
Utilizing angle guides doesn’t mean a one-size-fits-all approach; different knives demand varied techniques․ Japanese knives, often featuring thinner blades and steeper angles (15-20 degrees), require a delicate touch and precise guide alignment․ Western knives, typically with 20-25 degree angles, benefit from a more robust sharpening motion․
Pocket knives and fillet knives also have specific angle needs․ Adjusting the guide to match the existing blade angle is paramount․ Experimentation, combined with careful observation of the burr formation, helps refine the process for each unique blade geometry․ Consistent pressure and slow, controlled strokes are vital across all knife types․
Dealing with Damaged Blades
Severely damaged blades, exhibiting chips or significant dullness, require a phased approach even with an angle guide․ Initially, focus on reshaping the edge using coarser grits to remove material quickly․ Avoid applying excessive pressure, which can exacerbate the damage․ An angle guide ensures consistent removal, preventing further distortion of the blade’s geometry․
Progress gradually to finer grits, refining the edge and eliminating scratches․ Persistent chips may necessitate multiple passes and careful burr removal․ Patience is key; attempting to rush the process can lead to uneven sharpening or further blade damage․ Regular sharpening prevents such extensive repairs․
Burr Formation and Removal
During sharpening, a “burr” – a microscopic bend in the steel – forms on the opposite side of the edge being worked․ This indicates metal removal and edge progression․ An angle guide helps create a uniform burr along the entire blade length․ Alternating sides with each pass encourages burr development․
Removing the burr is crucial for achieving true sharpness․ Lightly stropping on a fine abrasive or using alternating, very gentle sharpening strokes eliminates it․ Feel for the burr with your fingertip (carefully!) to confirm its removal․ A consistent angle during burr removal prevents rounding the edge․
Stropping After Sharpening
Stropping refines the edge after sharpening, removing any remaining burr and polishing the steel․ Using an angle guide during stropping maintains the established bevel angle․ Leather strops, often with polishing compounds, are common․ Draw the blade across the strop, away from the cutting edge, maintaining a consistent, low angle․
Multiple passes, gradually reducing pressure, enhance the polish․ Stropping doesn’t remove significant metal; it aligns the microscopic steel fibers․ Regular stropping extends the time between full sharpenings․ An angle guide ensures even polishing and prevents rounding the delicate edge․

Troubleshooting Common Issues
Maintaining a consistent angle proves challenging for some, leading to uneven sharpening or scratch marks․ Angle guides help, but practice is vital for overcoming these common hurdles․
Difficulty Maintaining the Angle
One of the most frequent challenges faced by those new to knife sharpening, even with an angle guide, is consistently holding the correct angle throughout the entire stroke․ It’s easy to start well but drift as you move along the sharpening stone․ This often results in a blade that isn’t uniformly sharp, with some sections having a more acute or obtuse angle than others․
To combat this, focus on using your entire arm and shoulder for movement, rather than just your wrist․ Slow, deliberate strokes are far more effective than quick, jerky ones․ Regularly check the angle guide’s position against the blade to ensure it hasn’t shifted during the process․ Practice makes perfect, so don’t be discouraged by initial inconsistencies!
Uneven Sharpening
Uneven sharpening frequently occurs when pressure isn’t applied consistently across the blade’s length during the sharpening process, even when utilizing an angle guide․ Variations in pressure can cause certain sections of the edge to be sharpened more aggressively than others, leading to an inconsistent cutting performance․ Another cause is failing to sharpen the entire length of the blade equally․
Ensure you’re applying firm, even pressure from heel to tip with each stroke․ Visualize the blade’s edge and consciously work to maintain consistent contact with the sharpening stone․ Periodically inspect the blade to identify any areas that may require additional attention․ Correcting this requires patience and focused technique․
Scratch Marks on the Blade
Scratch marks on the blade often result from using a sharpening stone with an abrasive grit that is too coarse for the steel type or the level of sharpening needed․ Aggressive grits remove material quickly but can leave visible scratches․ Contamination on the stone – like metal particles or debris – can also cause scratching․
Regularly clean your sharpening stone to remove abrasive particles․ Progress through grits, starting with coarser stones for repair and finishing with finer ones for polishing․ Ensure the blade remains clean during sharpening․ Consider using a honing oil or water lubricant to reduce friction and minimize scratching․
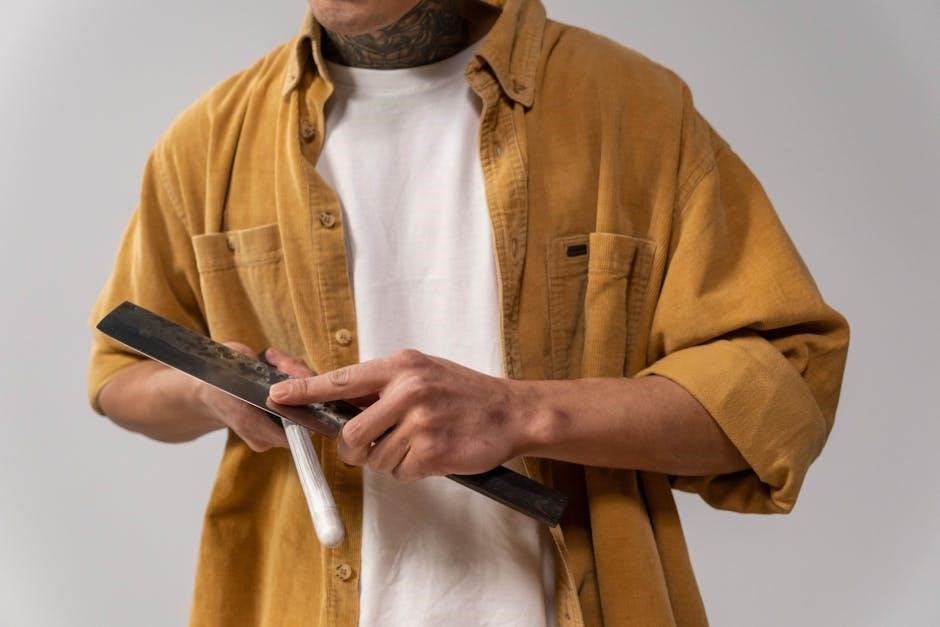
Maintaining Your Angle Guide
Regular cleaning and proper storage are vital for longevity․ Inspect for wear and tear, replacing worn components promptly to ensure continued accuracy during sharpening․
Cleaning and Storage
After each use, thoroughly clean your angle guide to remove metal filings and abrasive residue․ Use a soft brush or cloth and mild soap, avoiding harsh chemicals that could damage the guide’s components․ Ensure it’s completely dry before storing to prevent rust or corrosion, especially for metal guides․
Proper storage is equally important․ Keep the guide in a dry, protected environment, away from extreme temperatures and humidity․ A dedicated case or pouch is ideal to prevent scratches and maintain its shape․ Avoid storing it with other tools that could cause damage․ Regular maintenance extends the life and accuracy of your angle guide․
Checking for Wear and Tear
Regular inspection of your angle guide is vital for maintaining sharpening accuracy․ Examine the guide’s surface for any cracks, chips, or deformation, particularly on the parts that contact the blade․ Check magnetic guides for diminished magnetic strength, impacting their secure hold․ Inspect clip-on guides for looseness or damage to the clamping mechanism․
Pay attention to any changes in the guide’s ability to maintain a consistent angle․ Worn components can lead to uneven sharpening․ Replace damaged parts promptly to ensure optimal performance and prevent potential damage to your knives․ Proactive checks save frustration and maintain sharp results․
Replacing Worn Components
Timely replacement of worn components is crucial for maintaining the effectiveness of your angle guide․ Consult the manufacturer’s instructions for specific replacement procedures and compatible parts․ For bench stone guides, replace worn guide sleeves or rollers to ensure smooth and accurate blade contact․ Magnetic guides may require replacement of the magnetic base if strength diminishes․
Clip-on guides often have replaceable clips or rubber pads; ensure a snug fit after replacement․ DIY guides may necessitate rebuilding or reinforcing weakened sections․ Using worn parts compromises sharpening quality and risks blade damage, so prioritize replacements․
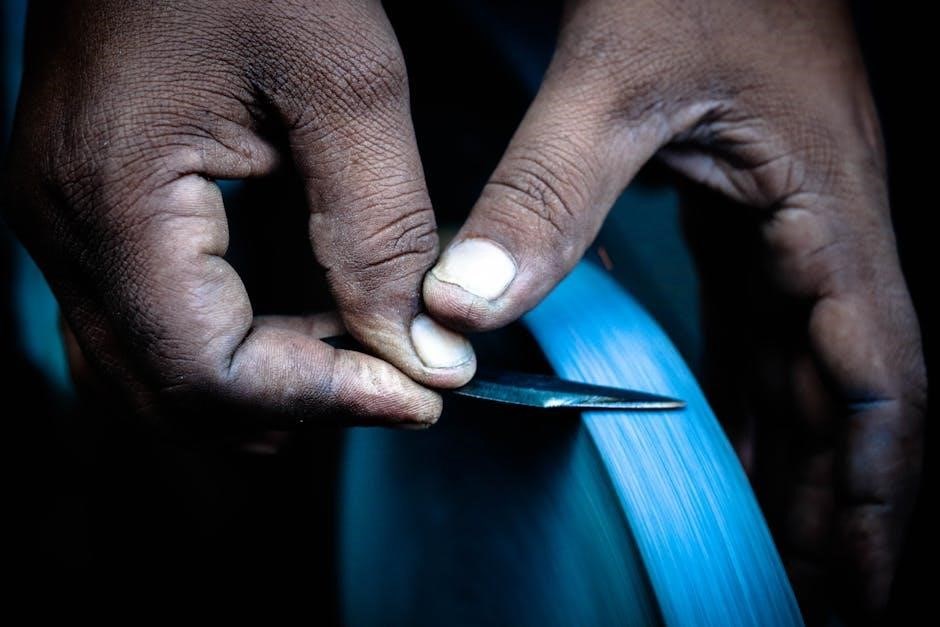
Safety Precautions
Always prioritize safety when sharpening․ Wear cut-resistant gloves to protect your hands, and handle stones and blades with care to prevent accidents and injuries․
Protecting Your Hands
Sharp knives demand respect, and protecting your hands during sharpening is paramount․ Investing in cut-resistant gloves is a wise decision, providing a crucial barrier against accidental slips․ These gloves aren’t foolproof, but significantly reduce the risk of severe cuts․ Focus intently on the task, avoiding distractions that could lead to errors․
Maintain a firm grip on both the knife and the angle guide, ensuring stability throughout each stroke․ Never attempt to sharpen a knife when fatigued, as this impairs judgment and coordination․ Consider using a non-slip mat under your sharpening stone to prevent it from sliding during use, further enhancing safety and control․
Proper Stone Handling
Sharpening stones, whether natural, synthetic, or diamond, require careful handling to ensure both safety and longevity․ Always inspect your stone for cracks or damage before each use, discarding any compromised stones․ Keep stones clean by wiping them with a damp cloth after each sharpening session, removing metal filings and debris․
When soaking water stones, fully submerge them to ensure even saturation, avoiding air bubbles․ Avoid dropping stones, as this can cause breakage․ Store stones properly in a dry, protected location to prevent chipping or wear․ Use a stable surface for sharpening, preventing unwanted movement during the process․
Safe Blade Handling
Prioritizing safety is paramount when sharpening knives, even with the assistance of angle guides․ Always sharpen away from your body, maintaining a firm grip on both the knife and the sharpening tool․ Use a non-slip surface to prevent accidental movement during the sharpening process․ Never attempt to catch a falling knife; let it drop and move clear․
Keep your fingers clear of the blade’s path, utilizing a controlled and deliberate motion․ Inspect the blade for any existing damage before sharpening, addressing any issues carefully․ Store knives securely when not in use, protecting both yourself and others․
Resources and Further Learning
Expand your knowledge through online tutorials, recommended books, and engaging with knife sharpening communities․ These resources offer valuable insights and support for mastering sharpening techniques․
Online Tutorials and Videos
Numerous online platforms host comprehensive knife sharpening tutorials, specifically focusing on angle guide techniques․ YouTube is an excellent starting point, featuring channels dedicated to culinary skills and tool maintenance, offering visual demonstrations of each step․ Websites like Instructables and various knife enthusiast forums also provide detailed guides with accompanying images․
These videos often showcase different angle guide types – bench stone systems, magnetic guides, and clip-on options – and explain how to use them effectively․ Look for tutorials that emphasize consistent pressure, maintaining the correct angle, and recognizing burr formation․ Don’t hesitate to explore multiple sources to gain a well-rounded understanding of the process and find a teaching style that resonates with you․
Recommended Books on Knife Sharpening
While online resources are plentiful, several books offer in-depth knowledge of knife sharpening, including techniques utilizing angle guides․ “The Complete Guide to Sharpening” by Charles Steel is a highly regarded resource, covering various sharpening methods and blade geometries․ “Knife Sharpening Made Easy” by Steve Bottorff provides a beginner-friendly approach, with clear illustrations and step-by-step instructions․
These books often delve into the theory behind sharpening, explaining the impact of angles on performance and detailing different abrasive materials․ They can be particularly helpful for understanding the nuances of burr formation and removal, and for troubleshooting common sharpening issues․ Investing in a quality book complements online learning, offering a comprehensive and lasting reference․
Knife Sharpening Communities and Forums
Engaging with online knife sharpening communities and forums provides a valuable platform for learning and sharing knowledge, especially regarding angle guide techniques․ BladeForums․com and KnifeTalkForum․com host active discussions on sharpening methods, tool recommendations, and troubleshooting; These forums allow users to ask questions, receive feedback, and learn from experienced sharpeners․
Many dedicated groups on platforms like Reddit (r/sharpening) offer similar support and resources․ Sharing photos of your work and receiving constructive criticism can significantly improve your skills․ These communities are excellent for staying updated on new products and techniques, and for finding solutions to specific sharpening challenges․